 Skip to content
Basics of 3D Needle Felting
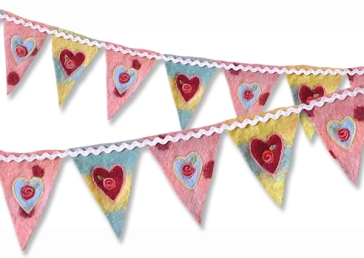
There are two different types of felting: Applique & Sculptural/3D
About the needles:
 there are many different kinds of commercial felting needles however hand felting needles come in triangle or star.
The bigger the number on the needle the smaller the needle sized. So a 36 gauge is a medium needle or more of a workhorse, while 40 gauge would be a superfine finisher leaving the smallest holes in the project.
The barbs on the blade of the needle pick up fibers on the downward movement and carry these fibers as deep as the needles are pushed. So when needle felting 3D object after creating the basic shape, the needle doesn’t need to pass beyond 70% into the project unless specified.
The more times the needles pass through the fibers the denser and stronger the fabric will be, until it passing the needle through the fabric creates fiber damage (ripping) as there is no room for movement in the batting or web.
Sometimes you place a cheaper batting or lesser processed fiber in the center of 3D pieces, take care however because depending on how you felt that in place it can cause shifting in the piece.
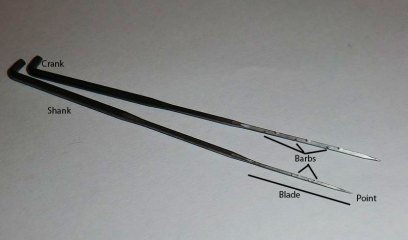
- Crank- the 90° bend on the top of the needle (this is because needles are the same used for industrial felting)
- Shank- thickest part of the needle
- Blade- working part of the needle blade passes into the fibers and is where the barbs are
- Barbs- the barb carries and interlocks the fibers the shape and size of the barbs changes the effect applied to the finished project. It is really more of a notches
- Point- the very tip, a bent tip can lead to needle breakage, it also allows for the maximum surface appearance as bigger tips leave bigger holes.
Here is a basic walk through of 3D Needle Felting
WARNING: The needles are long, barbed and extremely sharp, they will really tear flesh. You could think of them as a multi-fanged fish hook without the bend. So if your kids are too small to go fishing they might be too small to needle felt. It is extremely important to identify a quiet work space where one can focus and remain attentive (without being bumped into) while felting.

When you’re getting started I would suggest you start at a table, with as limited distractions as possible. After you’ve needle felted for a while you can decide if you want to try felting in your lap (I’d still suggest that you have a lap table to work on, stabbing yourself in the thigh is decidedly unpleasant, as well as losing needles in the couch.)
Felting needles are brittle needles break easily if they are twisted in dense fiber, or if they hit a hard surface, like the table, which is why you need a thick enough foam.
Start by prepping some of your fiber, this means if you’re working with roving, you’re going to have to pull small pieces off and manipulate them to cobweb like pieces, then layer them so each layer of fiber goes in different directions. Starting like this makes it so you have to work less at getting the basic shape. When you have a mold you layer the cobwebs of wool into the mold, it’s fine if the wool over flows or hangs over. Next, start stabbing needle all the way through a tiny way into the foam work surface. Make sure you don’t twist the needle or try to take it out in a different angle than you entered. Once you have the beginnings of the fiber pinned fold over your extra fiber into the mold and start punching again. Now flip the whole thing over.
You’re going to repeat the process on the other side of the fiber,
We flip the fiber over so that we don’t felt into the foam pad.
Keep adding fiber until you have the thickness you want and an even shape inside the mold.
Next we ditch our mold. This is where we have to be extra careful with our fingers, because we are not going straight into the fiber and we need to hold the piece at the angle to have the needle go into the piece but not our fingers, we really need to be careful.
Keep shaping the fiber with the needle until you have the shape you want. As you get closer to finishing keep downsizing your needles, until you are using your smallest finest needles. You can tack different designs onto your piece by slowly setting and pushing your finest needle into the piece. Take your time when your are tack contrasting colors, because once you tack the color in place, you will never be able to get rid of that color completely.
Good Luck! If you have questions put them in the comments and I’ll be happy to answer them!