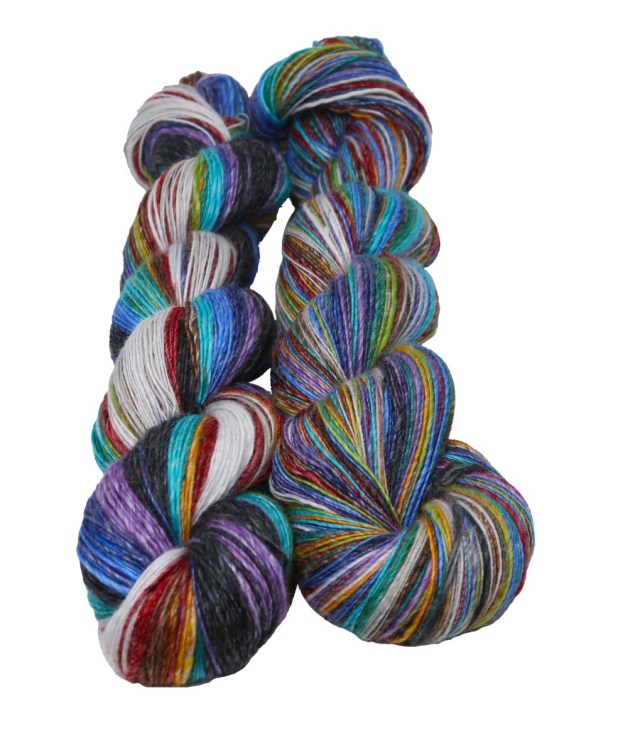
November Fiber Club: A 12 Color Fractal Spinning Tutorial with The GEMS of Paradise!
Inspired by Gemstones, all 12 colors of our new line of fiber, Gems of Paradise, made it into our Fiber Club members Box for November! It was a GEM PACKED, GEM THEMED, ROSE FIBER EXPLOSION! Also included in our November Box was a unique Hand Made Gemstone Orifice Hook, Mountain Rose Tea, a limited edition Gem Sheep Sticker, and an easy recipe to Fractal Spin the Gem line. Here are some of the club members reactions to this month’s box of goodies:


The Gems of Paradise
Find your fade in our new Gem inspired line of micro-blends. These combed tops consist of Rose fiber, Superfine Merino Wool, Faux Cashmere, and Mulberry Silk! This fiber lends itself to beautiful yarn with incredible drape and luster. These blends are super soft and feel like butter in your hands. Which colors are your favorite? Get them here.

FRACTAL SPINNING
A fractal is when a similar pattern recurs at progressively smaller scales which has the same character as the whole. You can find these fractal patterns in crystal growth, galaxy formation, snowflakes, and so much more. Here are the steps to create your own fractal yarn.
Step 1: Determine your fiber – In this case we are using 12 colors ( 20 grams each ) found in our Gems of Paradise Line. You can use as little as two colors or as many as 100 or more.
Step 2: Prep your fiber – In order to achieve a fractal yarn we are going to split all 12 colors into two equal parts in order to end up with two 10 gram portions of each color. Once you’ve chosen what order you want to spin your colors, arrange the colors in a basket or on a table or on the floor beside you so you don’t mix up the order. I spun in the following color order:
Diamond
Opal
Ruby
Tiger’s Eye
Topaz
Peridot
Malachite
Turquoise
Sapphire
Tanzanite
Amethyst
Onyx
Our Fractal yarn is going to end up being a 2-ply yarn; to start we are going to spin a full bobbin of all 12 colors, spinning the colors, worsted style, from end to end to create a yarn with long color blocks. You can read all about worsted style spinning in our previous blog post here. My bobbin allowed for each color to fill the bobbin with one even pass, spinning 10 grams of each color approximately. I introduced a good amount of twist to the yarn since I will be plying in the opposite direction later, I didn’t want to lose any twist.
Step 3: Split your second grouping of fiber – Once you’ve spun a full bobbin of one grouping of fiber set your bobbin aside and you’re ready to spin your second single. Split your second grouping of fiber lengthwise into 8 -10 smaller equal portions. You will spin each grouping in the same color order as your first single spun, spinning end to end to create short color blocks. Introduce the same amount of twist as your previous single and spin in a worsted style.


Step 4: Time to Ply – Once you have both of your bobbins full you are ready to ply. If you have a Tensioned Lazy Kate on your wheel you can easily achieve this. If you do not have a Lazy Kate you can turn your bobbins into center pull yarn balls using a Swift and a ball winder. This will allow you to hold the two cakes separate and ply. For this demonstration I used the Paradise Fibers Tensioned Lazy Kate. I chose this Lazy Kate because it is not attached to a wheel and I can place it anywhere near me to Ply. It’s important to remain consistent and be comfortable as you ply. Attach both ends of your two bobbins to your leader on your wheel and pull an arms length of yarn

off the bobbins and begin treadling. I set the Lazy Kate about 6 feet away from me in order for my twist to better even out in the distance before I ply.

Since my arm’s length is quite long I treadled approximately 14 times to get the amount of twist desired before allowing the flyer to take the yarn up and disperse onto the bobbin. I used a Jumbo flyer since i knew I had about 4 oz of fiber on each bobbin and would need a bigger bobbin to hold all the yarn. To test the amount of twist, stop treadling and ease the tension on a plied section. If you plan to soak your yarn once finished, a little ply back on itself is okay. If not, you should try to achieve a nice “U” bend in your yarn. Repeat these steps, giving the same amount of twist for each pull, until your two bobbins are empty. It was very intriguing to see all the different colors align. I stopped several times to capture the interesting fractal effect.


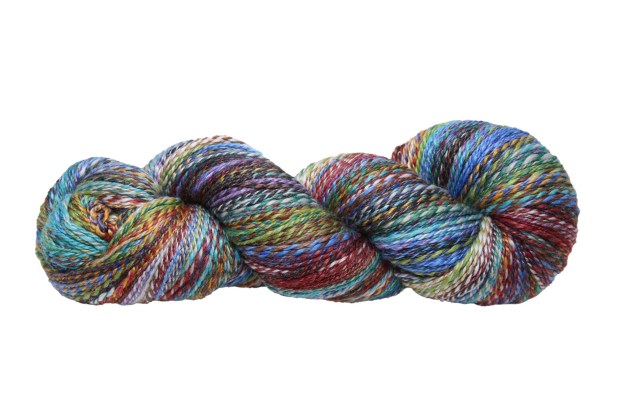
Step 5: Skein and Soak – now that you are a master plyer with a bobbin full of 8 oz. of fractal delight you must skein and soak your beautiful creation! I used a Paradise Fibers Adjustable Niddy Noddy to skein my yarn off the bobbin. I tied the skein in 4 places with scrap yarn to keep it all in place and to prevent tangling. I made sure to count each strand of yarn on one side and multiplied the number by 2 because I set my Niddy Noddy to 2 yards before skeining. I ended up with about 450 yards of yarn. I filled my sink with warm water and a tablespoon of Soak and let my yarn soak overnight. This allows the fibers to really BLOOM and softens the twist. The next morning I gently squeezed out any excess water and rinsed the skein to get all the soak out. Finally I gave my skein a good THWAK! or two on the table and hung to dry. Here are my results! Now what should I make with it…..hmmm.


Fractal spinning is a great way to experiment with color and add interest into your yarn! Have you Fractal Spun before? Share your experience in the comments section below. Share this post with your fiber friends if you love it! If you’d like to receive exclusive fiber like this every month with a recipe and other goodies, join our club and share your creations with other members in our Ravelry group! Happy Spinning everyone!
